Disclaimer: This post contains affiliate links. This means that I will receive a small commission from any purchase made from this post at no additional cost to you.
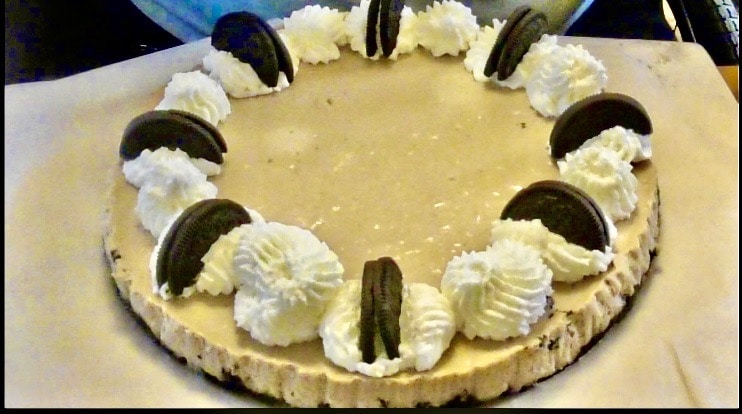
Hi Everyone, So I know this is a tad late but Happy New Year! I hope the new year is treating you well. If 2019 was a bit of a roller coaster like mine was, I hope that 2020 is a little smoother so far. If 2019 was great, I hope 2020 continues to be great. Let’s start off strong with this coffee flavored cheesecake. Espresso/Oreo Cheesecake to be exact.
I love the promise that a new year and especially a new decade brings. Just a fresh start.
What I chose to do with my fresh start is start a youtube channel.
It’s a channel to go along with this blog (Not instead of. Don’t worry, this blog is going nowhere!) where I am going to be posting baking tutorials to go along with each post.
The video for this post will be coming on Saturday, 1/18/20. My channel is just called Clumsy Cakes if you want to check it out and/or subscribe.
Let’s Break It Down

A very popular new years resolution is to eat better. This can be thought of in a couple of ways.
Eating healthier, which means no cheesecake which is just a very sad way to live life.
Or, eating better could mean literally eating better and more delicious food. That’s where Clumsy Cakes saves the day with a beautiful, silky-smooth, creamy Espresso/Oreo Cheesecake.
One of my favorite things to do in baking is take requests. Then, I figure out what that baked good will be depending on that request.
So we had a family party for Christmas and new years and I got the request to make an espresso Oreo Cheesecake. So, I knew that I had to use my Oreo Crust Recipe (my favorite) with an espresso cheesecake base. Then topped with my Stabilized Whipped Cream Recipe and more Oreos. So, let’s get to it
Mixing The Coffee Flavored Cheesecake Batter
When mixing the cheesecake filling or batter, there are a few things to keep in mind.
Firstly, the cream cheese. It isn’t so important to have all of your ingredients at room temperature but it makes it a lot easier if your cream cheese is at room temperature because it takes less time for the cream cheese to get completely smooth.
When you are mixing a cheesecake batter/cream cheese mixture that has any flavoring or changes the color, you want to make sure it’s perfectly smooth so you don’t get ugly white specks of unsoftened cream cheese in your finished products.
To do this it’s best to remember to stop the mixer and scrape down the bottom and the sides of the bowl between every step.
This will ensure that you don’t run into a big chunk of unincorporated batter when you go to pour the cheesecake in the prepared springform pan. Nothing is more frustrating to me than that.
Flavoring
When flavoring a cheesecake recipe, what I like to do is add whatever the flavoring is (in this case instant espresso powder or instant coffee granules) little by little until you can taste the flavoring but it isn’t so overpowering that you don’t taste cheesecake anymore.
I added it a teaspoon at a time and I ended up adding 2 TBSP but you can add more or less if you want. You could also use coffee extract or fresh brewed coffee to get the coffee flavor.
In a baked cheesecake, I find that the flavor develops a little In the oven so it’s good to make it a little subtle in the raw batter and by the time it’s baked, cooled and chilled, it’ll be perfect.
Toppings
For toppings on this cheesecake, I like to use fresh stabilized whipped cream and Oreo cookie halves but you could also use espresso beans, chocolate shaving, chocolate ganache made with heavy whipping cream and chocolate chips or powdered sugar.
Baking, Cooling And Chilling The Cheesecake
No after your coffee cheesecake batter is in the prepared springform pan on top of the prepared crust it’s time for baking.
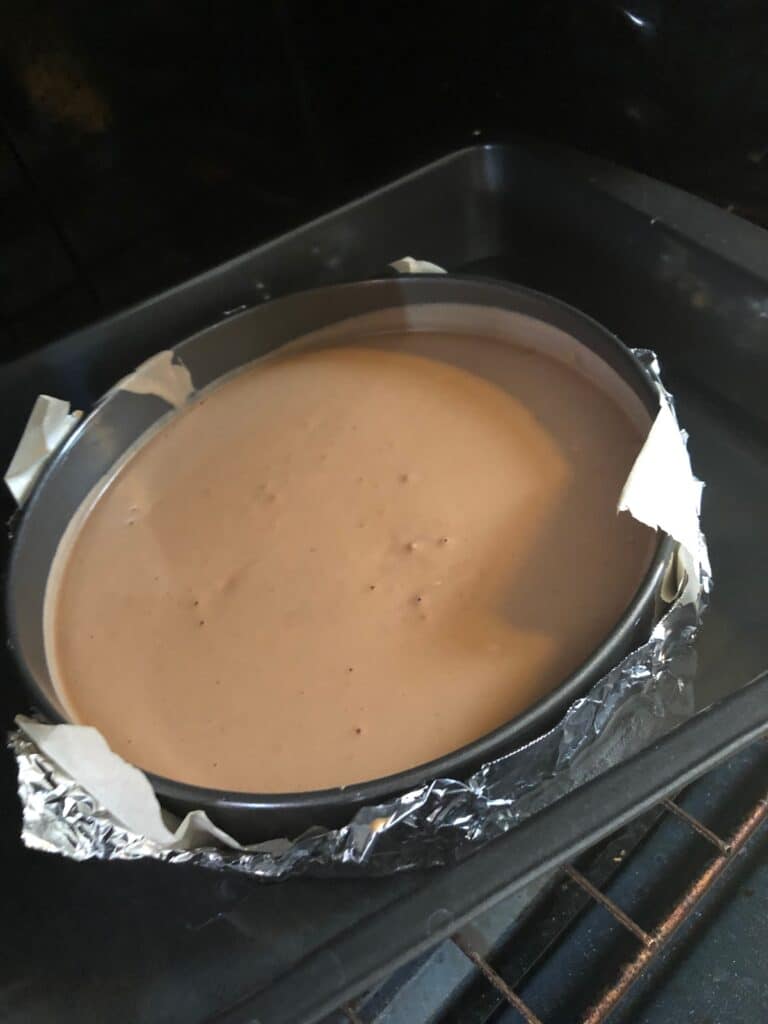
To bake a cheesecake, you need a water bath. A water bath is just a bigger pan that the cheesecake pan can it into like a roasting pan. This pan is then filled with water until it reaches half way up the sides of the springform pan.

Try this delicious cheesecake for yourself. You won’t regret it. And again, check out my YouTube channel linked below. Leave me a comment and let me know what you want to see next and I will see you all next time.

Espresso/Oreo Cheesecake
A rich, and creamy espresso flavored cheesecake with Oreo crust, Topped with homemade stabolized whipped cream and more Oreos.
Ingredients
Oreo Crust
- 2 Rows of Oreos
- 3 TBSP of melted Butter
Cheesecake
- 3 (8oz) Blocks of Cream Cheese
- 1 Cup of Granulated Sugar
- 1/2 of a Cup of Greek Yogurt
- 5 Eggs
- 2 Tbsps of Instant Espresso Powder
- 1 Tbsp of Vanilla Extract
- 4 Halved Oreos (8 Halves)
Stabilized Whipped Cream
- 1 Teaspoon of Unflavored Gelatin
- 2 Teaspoons of Cold Water
- 1 Teaspoon of Boiling Water
- 1/2 of A Cup of Granulated Sugar
- 1 Cup of Heavy Cream
Components
Instructions
For Crust
- Prepare a 9 inch springform pan by lining the outside bottom and sides with aluminum foil and the inside bottom with a parchment paper circle. Line the insides sides with 2 15 x3 inch pieces of parchment paper. Spray the inside with non stick spray so the parchment paper sticks to the pan.
- Place the graham crackers in a food processor or freezer bag. Pulse or crush with a rolling pin or meat tenderizer until you get coarse crumbs.
- Add the butter and optional sugar and pulse or crush until you get the texture of wet sand.
- Press this mixture into your prepared pan in an even layer.
- Bake for 10 minutes or until golden brown.
- Place in the freezer for 1 hour.
For Cheesecake
- Place the softened cream cheese in the bowl of your standing mixer fitted with a paddle attachment or regular bowl with a hand mixer.
- On medium speed, beat the cream cheese until completely smooth. About 10 minutes. Scrape down the bottom and the sides of the bowl and beat again until smooth.
- Add in the Instant Espresso Powder a tsp at a time, tasting as you go until you get an espresso taste but can still tate cheesecake.
- Add in the sugar and beat until smooth and all incorporated. Scrape down the bottom and the sides of the bowl and beat once more until smooth.
- Repeat this step with the greek yogurt and the vanilla extract. Make sure the batter is completely smooth at this point before the next step.
- Add in the eggs, one at time, Beating between each addition to incorporate and scraping down the bottom and the sides of the bowl to make sure everything is incorporated fully.
- Pour the batter into a sieve the is held over your prepared crust.
Push the batter through the sieve until all of the smooth batter is in the pan and the chunks are left behind. - Bake the cheesecake in a water bath for 45 minutes to an hour or until the edges are set but the middle jiggles slightly.
- Shut off the oven, crack the oven door and leave the cheesecake in the oven for an additional hour to cool.
- Take the cheesecake out of the oven and place it covered in the fridge overnight.
Stabilized Whipped Cream
- Combine the cold water and the unflavored gelatin in a small bowl and set aside to set. It's ready when it looks like a brown/tan blob. This will Take about 5 minutes.
- Place heavy cream in the bowl of strand mixer with a whisk attachment or regular bowl with a hand mixer.
- Beat until frothy. About 3 minutes.
- Add in the sugar in a steady stream while beating until you get soft peaks. About 3-5 minutes. In the meantime, add in the boiling water to the gelatin and stir to dissolve.
- Add the gelatin to the whipped cream and beat until stiff peaks form. This happens fast with the addition of the gelatin so make sure to not over-beat. Once the peak stands straight up on the beater, it's ready.
- Transfer to a piping bag with a star tip and place in the fridge until ready to use.
For Decoration
- Use a serrated knife to slowely and gently cut the Oreos in half. You need 8 laves so that's 4 cookies.
- Take the cheesecake out of the fridge and unmold the dides of the pan.
- Carefully take off the parchement paper on the sides.
- Lay a piece of parchment paper over the top of the cheesecake followed by a light weight cutting board.
- Gently flip the cake of er so that the cake is upside down.
- Take off the bottom of the pan as well as the parchment paper circle.
- Place your serving plate over the top of the crust and gently flip it back over.
- Place 16 rosettes of whipped cream around the sides of the cheesecake.
- Place a cookie half on every other rosette.
- Eat immediately and/or place leftover, covered in the fridge for up to 2 weeks.
You May Also Like
Chocolate Graham Cracker Crust
If you have any questions or comments please don’t hesitate to leave a comment down below, message me on instagram, facebook or leave me an email.
Facebook –facebook.com/Clumsy-Cakes-2058041137644585
Instagram-instagram.com/clumsy-cakes
pinterest –pinterest.com/clumsycakes
email – [email protected]